How to Build a Cold Room: Steps and Materials

Building a cold room comes down to five chained decisions: sizing the space according to the product and its turnover, choosing the insulation and its thickness, calculating the heat load to select the refrigeration equipment, solving the floor and drainage, and guaranteeing airtightness with the right doors and seals. Each one conditions the next, and getting the first wrong forces you to correct all the others.
This guide develops each step with technical criteria, includes the regulations that apply when food is stored and closes with an honest comparison between a cold room built on site and the alternative of using a refrigerated container.
What a cold room is and when it is justified
A cold room is a thermally insulated enclosure fitted with a refrigeration system that keeps temperature and relative humidity stable within a defined range. It is not simply a room with a cooling unit: it is an envelope designed so that the heat coming in from outside is less than what the machine can extract, sustainably and at a reasonable energy cost.
It is justified when product volume and turnover make storage in commercial equipment unfeasible, when the process demands a strict temperature range, or when the operation needs interior working space for picking, packing or inspection. If you only need storage for one season or at a site that may change, the equation is different and it is worth reviewing the last section of this article.
Step 1: sizing by volume and product
Sizing does not start from the square meters available but from the product. You need four figures: how many kilos or units will be stored at peak production, how they are stowed (pallets, crates, hooks, racks), how long they stay inside and how many inbound and outbound movements there are per day.
With that you define the net product volume and add the spaces that do not store anything but are mandatory: circulation aisles for material handling equipment, clearance between pallets and walls so air can circulate, free height under the evaporator and maneuvering space in front of the door. Squeezing those margins is the most expensive mistake, because it blocks air circulation and creates hot spots inside the room itself.
Height deserves separate attention: using height is usually cheaper than expanding floor area, but it requires racks, an evaporator with enough throw and an air distribution study so the upper part does not sit several degrees above the set point.
Step 2: insulation and thickness
Insulation is what defines the room's energy consumption over its whole service life. The two dominant materials in sandwich panels are polyurethane and expanded polystyrene.
- Injected polyurethane (PUR/PIR): the standard in cold storage rooms. It offers better thermal conductivity per centimeter of thickness than polystyrene, good adhesion to the metal sheets and good structural behavior. In commercial panels a core density of around 40 kg/m³ (2.5 lb/ft³) is common.
- Expanded polystyrene (EPS): cheaper, but it needs more thickness to reach the same insulation, so it is used more in undemanding above-freezing applications or where initial cost matters more than consumption.
On thickness, the market reference for cold room panels runs from roughly 40 to 100 mm (1.5 to 4 in), with 50, 60 and 80 mm (2, 2.4 and 3 in) as the most common for chilled storage. For freezer rooms it goes up to the 100 mm (4 in) range and above, and for deep freezing to much greater thicknesses, around 150 to 200 mm (6 to 8 in). These are market orders of magnitude, not a prescription: the final thickness comes from the thermal calculation with your target temperature, your climate and your operating hours.
And a point that is always neglected: thermal bridges. Poorly interlocked panel joints, through-going metal profiles, anchors that cross the insulation and unsealed corner trims produce condensation, localized ice and continuous cold loss. An excellent panel badly assembled performs like a mediocre one.
Step 3: heat load calculation and refrigeration system
Equipment is selected after the heat load calculation, never before. That calculation adds up every source of heat the system will have to remove:
- Transmission through the envelope: the heat entering through walls, ceiling and floor, a function of the insulation and the temperature difference with the outside.
- Product load: the heat the goods bring in on entry, including latent heat if there is a change of state, and the respiration heat of fruit and vegetables, which stay alive after harvest.
- Air infiltration through door openings, proportional to the number of daily movements.
- Internal loads: lighting, fan motors, forklifts and people working inside.
- Defrost: the energy the system itself introduces when defrosting the evaporator.
With the total load you select the condensing unit and evaporator set. In small installations a compact or monoblock unit is common; in medium and large ones the split scheme is used, with the condensing unit outside and one or more evaporators inside. Manufacturers such as Carrier, Thermo King and Daikin offer lines for these applications, and the specific choice depends on the temperature range, the refrigerant and the technical service available in your area.
Two criteria that avoid problems: size with a reasonable margin for the peak of product intake, and define from the design stage how temperature will be monitored and recorded, because that record is a regulatory requirement, not an accessory.
Step 4: floor, drainage and humidity
The floor supports rolling and static loads and at the same time must insulate. A well-designed cold room floor combines an insulating layer able to resist compression without deforming, a vapor barrier and a high-strength, sanitary, non-slip finish.
In freezer rooms an additional problem appears: if the floor insulation is insufficient, the ground under the slab freezes, expands and lifts the structure (frost heave). That phenomenon is prevented with the right insulation and, in large installations, with ventilation or heating systems under the slab.
Drainage must evacuate defrost and wash water with a slope towards traps located outside the stowage areas, with a water seal and freeze protection on the piping. A frozen drain sends the water back onto the floor and creates dangerous sheets of ice.
Step 5: doors, curtains and airtightness
Door openings are the main way heat and humidity enter a room with high turnover. The decisions that matter here are the door type (hinged, sliding or sectional), the width actually needed for the material handling equipment, the quality of the gaskets and the mechanical resistance to forklift impacts.
The add-ons that make a difference are PVC strip curtains or air curtains in the opening, perimeter heaters that stop the door from freezing shut in freezer rooms, pressure relief valves that prevent the vacuum created by cooling from sealing the door, and the inside release mechanism, which is a matter of personal safety, not efficiency.
Materials and what each one does
| Material or component | What it is for | What to look at when choosing |
|---|---|---|
| Insulated sandwich panel | Thermal envelope of walls and ceiling | Core type, thickness, density, joint system, sanitary finish |
| Vapor barrier | Stop humidity from migrating into the insulation and degrading it | Full continuity: a perforated barrier is useless |
| Sealants and sanitary profiles | Close joints and prevent thermal bridges and dirt build-up | Food-contact suitability and low-temperature resistance |
| Insulated door | Access with minimum thermal loss | Gaskets, impact resistance, inside emergency release |
| Insulated floor and finish | Bear the load and cut transmission through the base | Compressive strength, slope to the drain, sanitary finish |
| Lighting | Allow safe work inside | Sealed fixtures with low heat output |
| Temperature control and recording | Operate within range and prove it | Calibrated sensors, historical log and alarms |
Applicable regulations
If food or food raw materials are stored in the cold room, the framework rule in Colombia is Resolution 2674 of 2013 from the Ministry of Health and Social Protection, which sets the sanitary requirements for manufacturing, processing, packaging, storing, transporting, distributing and selling food, enforced by INVIMA and the regional health authorities. Food storage in the United States falls under the FDA's Food Code and FSMA rules, and in Europe under Regulation (EC) 852/2004; the underlying requirements are the same.
From the Colombian resolution, three specific requirements are worth keeping:
- Article 28 establishes that there must be temperature and humidity control that ensures product preservation, and that the freezing temperature must be -18 °C (0 °F) or lower.
- The same article requires that temperature and humidity recording devices be inspected at regular intervals and their accuracy verified, that is, documented calibration.
- Storage must be orderly, on pallets, separated from the floor and the walls, in an area dedicated exclusively to that purpose.
When the cold room is part of a food plant that implements food safety assurance, Decree 60 of 2002 also applies in Colombia, promoting the HACCP system (Hazard Analysis and Critical Control Points) and regulating its certification. In a cold room, temperature is usually precisely a critical control point: the limit, the monitoring frequency, the corrective action and the record must be defined.
If the product is of agricultural origin and bound for export, the phytosanitary and animal health authority of the origin country steps in with its requirements and certification. On the technical front, the electrical installation must comply with the local electrical code, and refrigerant handling must respect the environmental regulations in force on controlled substances.
Built cold room vs. refrigerated container
Building is not always the best option. A refrigerated container is, in practice, a prefabricated, certified, mobile cold room, and in several scenarios it solves the problem better.
| Criterion | Built cold room | Refrigerated container |
|---|---|---|
| Time to start-up | Weeks or months: design, civil works, assembly and testing | Days: it arrives ready, only needs a level base and a power supply |
| Initial investment | High and one-off | Can be rented, turning capital investment into operating expense |
| Location flexibility | None: it stays where it was built | Can be relocated and returned when the season ends |
| Scalability | Expanding requires new construction | Units are added or removed as demand changes |
| Adaptation to the process | Total: geometry, racks and flows made to measure | Limited to the container's dimensions |
| Interior working space | Can be designed, with aisles and packing areas | Meant for storage, not for operating inside |
| Permits and civil works | Requires paperwork and construction | Much simpler installation |
The practical rule: build when volume is high and stable, the location is final and the process demands its own layout with staff circulation. Use refrigerated containers when the need is seasonal, urgent or likely to move, when you want extra capacity at harvest peak, or when you prefer not to tie up capital while you validate the operation. Many companies end up combining both: a fixed room for base inventory and containers for the peaks.
If you want to go deeper into how cold rooms are classified and how each type operates, see our article on
Frequently asked questions
What insulation thickness do I need?
It depends on the target temperature, the site climate and the operating hours, so it is defined by the thermal calculation. As a market reference, chilled storage usually uses panels between 50 and 80 mm (2 and 3 in), and freezing starts at 100 mm (4 in) and up.
How long does it take to build a cold room?
Assembling panels and equipment can be fast, but the full project includes design, civil works, electrical supply, assembly, testing and commissioning, and those stages dominate the schedule. When time is the main constraint, a refrigerated container goes into operation much sooner.
Do I need a health registration to have a cold room?
The cold room itself is not registered, but a facility that stores food is subject to the sanitary requirements of the applicable food regulations and to inspection by the health authority. That includes documented temperature control, storage conditions and cleaning and disinfection programs.
Can I use a reefer container as a permanent cold room?
Yes, it is a common use as long as it is installed on a level base, with an adequate power supply, ventilation for the unit and a maintenance plan. For continuous fixed operation it is worth checking the condition of the equipment and access to technical service with the same rigor you would apply to a built room.
What maintenance does a cold room require?
At a minimum, cleaning the condenser and evaporator, checking defrost and drains, inspecting gaskets and doors, checking for refrigerant leaks and calibrating the temperature sensors. The record of these routines is also what supports sanitary compliance during an inspection visit.
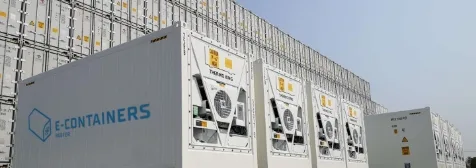 Looking for fast, cost-effective refrigerated storage? Discover how our reefer containers can meet your needs.